
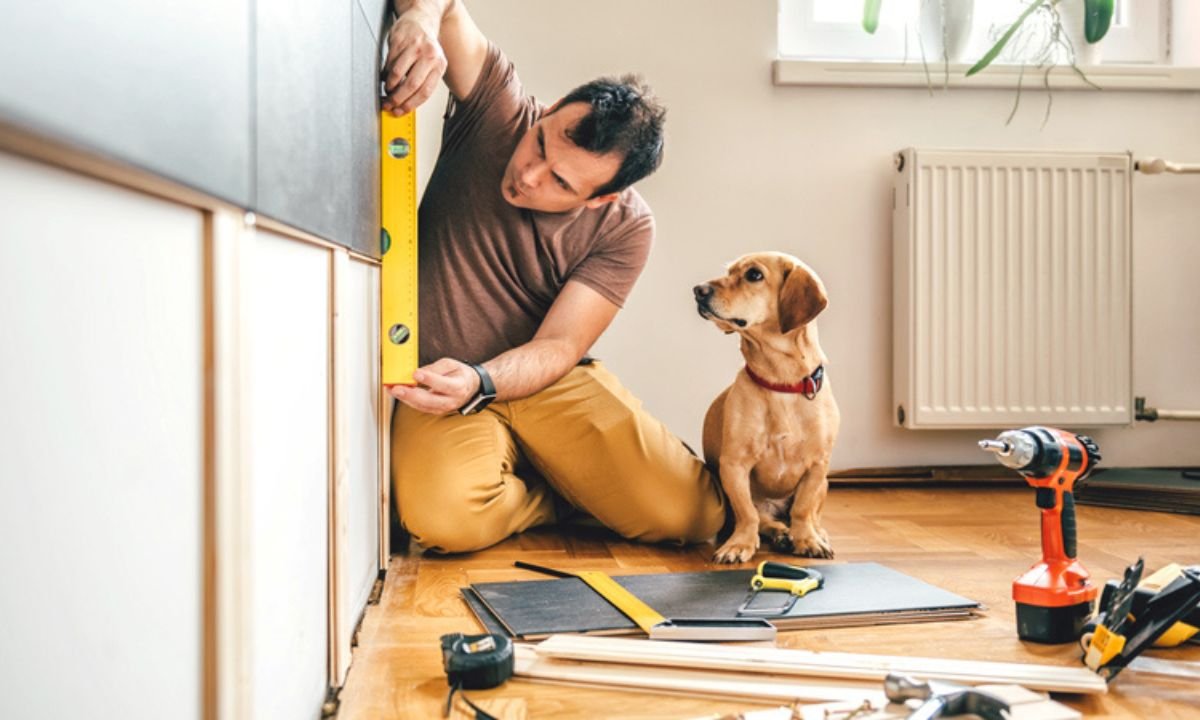
You don’t need a massive renovation budget or a contractor’s license to make your home look like a million bucks. I’ve been there—staring at the same tired walls or dingy cabinets, wishing for a fresh start without draining the savings account. The good news? A few hours (or a weekend) and the right DIY home projects can completely shift the energy of any room.
Whether you’re a budget-conscious homeowner trying to boost property value or a renter who wants to personalize without losing the security deposit, these projects are designed for you. I’ve pulled together 15 high-impact ideas that range from super-simple swaps to weekend warriors. They’re grouped by effort and cost, with real talk on time, money, and renter-friendly twists. Most come in under $100, and all deliver serious aesthetic upgrades and curb appeal.
The best part? Starting small with these DIY home projects builds your confidence for bigger ones later. Grab your tools, and let’s get your space feeling like you again.
Quick Wins: Easy DIY Home Projects for Beginners
These are the no-sweat starters—perfect if you’re new to DIY home projects or just want a quick win before tackling something bigger. They use basic supplies you can grab at any big-box store and take just a couple of hours.
The Power of Paint and Hardware
Nothing beats the instant glow-up from fresh paint and updated hardware. It’s like giving your home a new outfit without the shopping spree.
Project 1: Updating Cabinet Pulls and Door Handles Swap those dated knobs and pulls for sleek modern ones, and your kitchen or bathroom cabinets instantly look high-end. Cost: $20–$60 for a full set (think matte black or brass finishes that scream “current trend”). Time: 1–2 hours.
Here’s how:
- Unscrew the old hardware with a screwdriver.
- Clean the surfaces with soap and water (or a degreaser if they’re greasy).
- Use the new pieces as templates to mark holes if needed (or reuse existing ones).
- Screw in the fresh hardware—done!
Pro tip for renters: Save the originals in a ziplock bag so you can swap them back when you move. I did this in my first apartment, and it made the whole space feel custom without any permanent changes.
Source: sugarandcloth.com
Project 2: Painting an Accent Wall or Refreshing Trim Pick one wall (or your baseboards and trim) and slap on a bold color or crisp white. It brightens everything and adds personality fast. Cost: $30–$50 for a gallon of paint plus brushes and painter’s tape. Time: 3–4 hours.
Steps:
- Clear the area and tape off edges.
- Wipe walls clean.
- Roll on two coats (let the first dry fully).
- Remove tape while the paint is still slightly tacky for clean lines.
This is one of the easiest DIY home projects for beginners and adds huge value—think brighter, more open rooms with zero heavy lifting.
Entryway Upgrades for Instant Curb Appeal
First impressions matter, right? These outdoor-focused DIY home projects make your front door the star of the neighborhood and welcome guests (or you after a long day) with style.
Project 3: Painting the Front Door a Bold, Welcoming Color A fresh coat in navy, black, or a cheerful yellow transforms your entry in a single afternoon. Cost: $15–$40 for exterior paint and supplies. Time: 2–3 hours (plus drying time).
How to do it:
- Remove hardware and tape off glass/trim.
- Sand lightly and wipe clean.
- Apply two coats with a brush or roller.
- Reinstall hardware once dry.
Renter tip: Use a high-quality exterior paint that sticks well but won’t damage the original finish. I painted mine bold black last summer—it made the whole house pop and added instant curb appeal.

Source: postandporch.com
Project 4: Installing Modern House Numbers and Upgraded Mailbox Systems Upgrade those faded numbers and the rusty mailbox for a polished look. Cost: $20–$50. Time: 30–60 minutes.
Steps:
- Measure and mark level spots on your door or wall.
- Drill pilot holes if needed.
- Screw or adhesive-mount the new numbers and mailbox.
- Stand back and admire.
Super low-effort and renter-approved if you use removable adhesive hooks.
Interior Refresh: DIY Home Projects for Every Room
Now let’s move inside. These room makeover ideas bring style and function without breaking the bank or requiring pro skills.
Living Room Styling and Customization
Project 5: Building or Installing Floating Shelves Floating shelves display books, plants, and “curated” decor while keeping floors clear—perfect for small apartments. Cost: $25–$60 for wood, brackets, and screws. Time: 2–3 hours.
How:
- Locate wall studs with a stud finder.
- Cut and sand wood (or buy pre-made).
- Attach hidden brackets or cleats to studs.
- Slide shelves on and secure.
- Style with your favorite items.
I built a set in my living room last year—it added storage and personality without eating floor space.
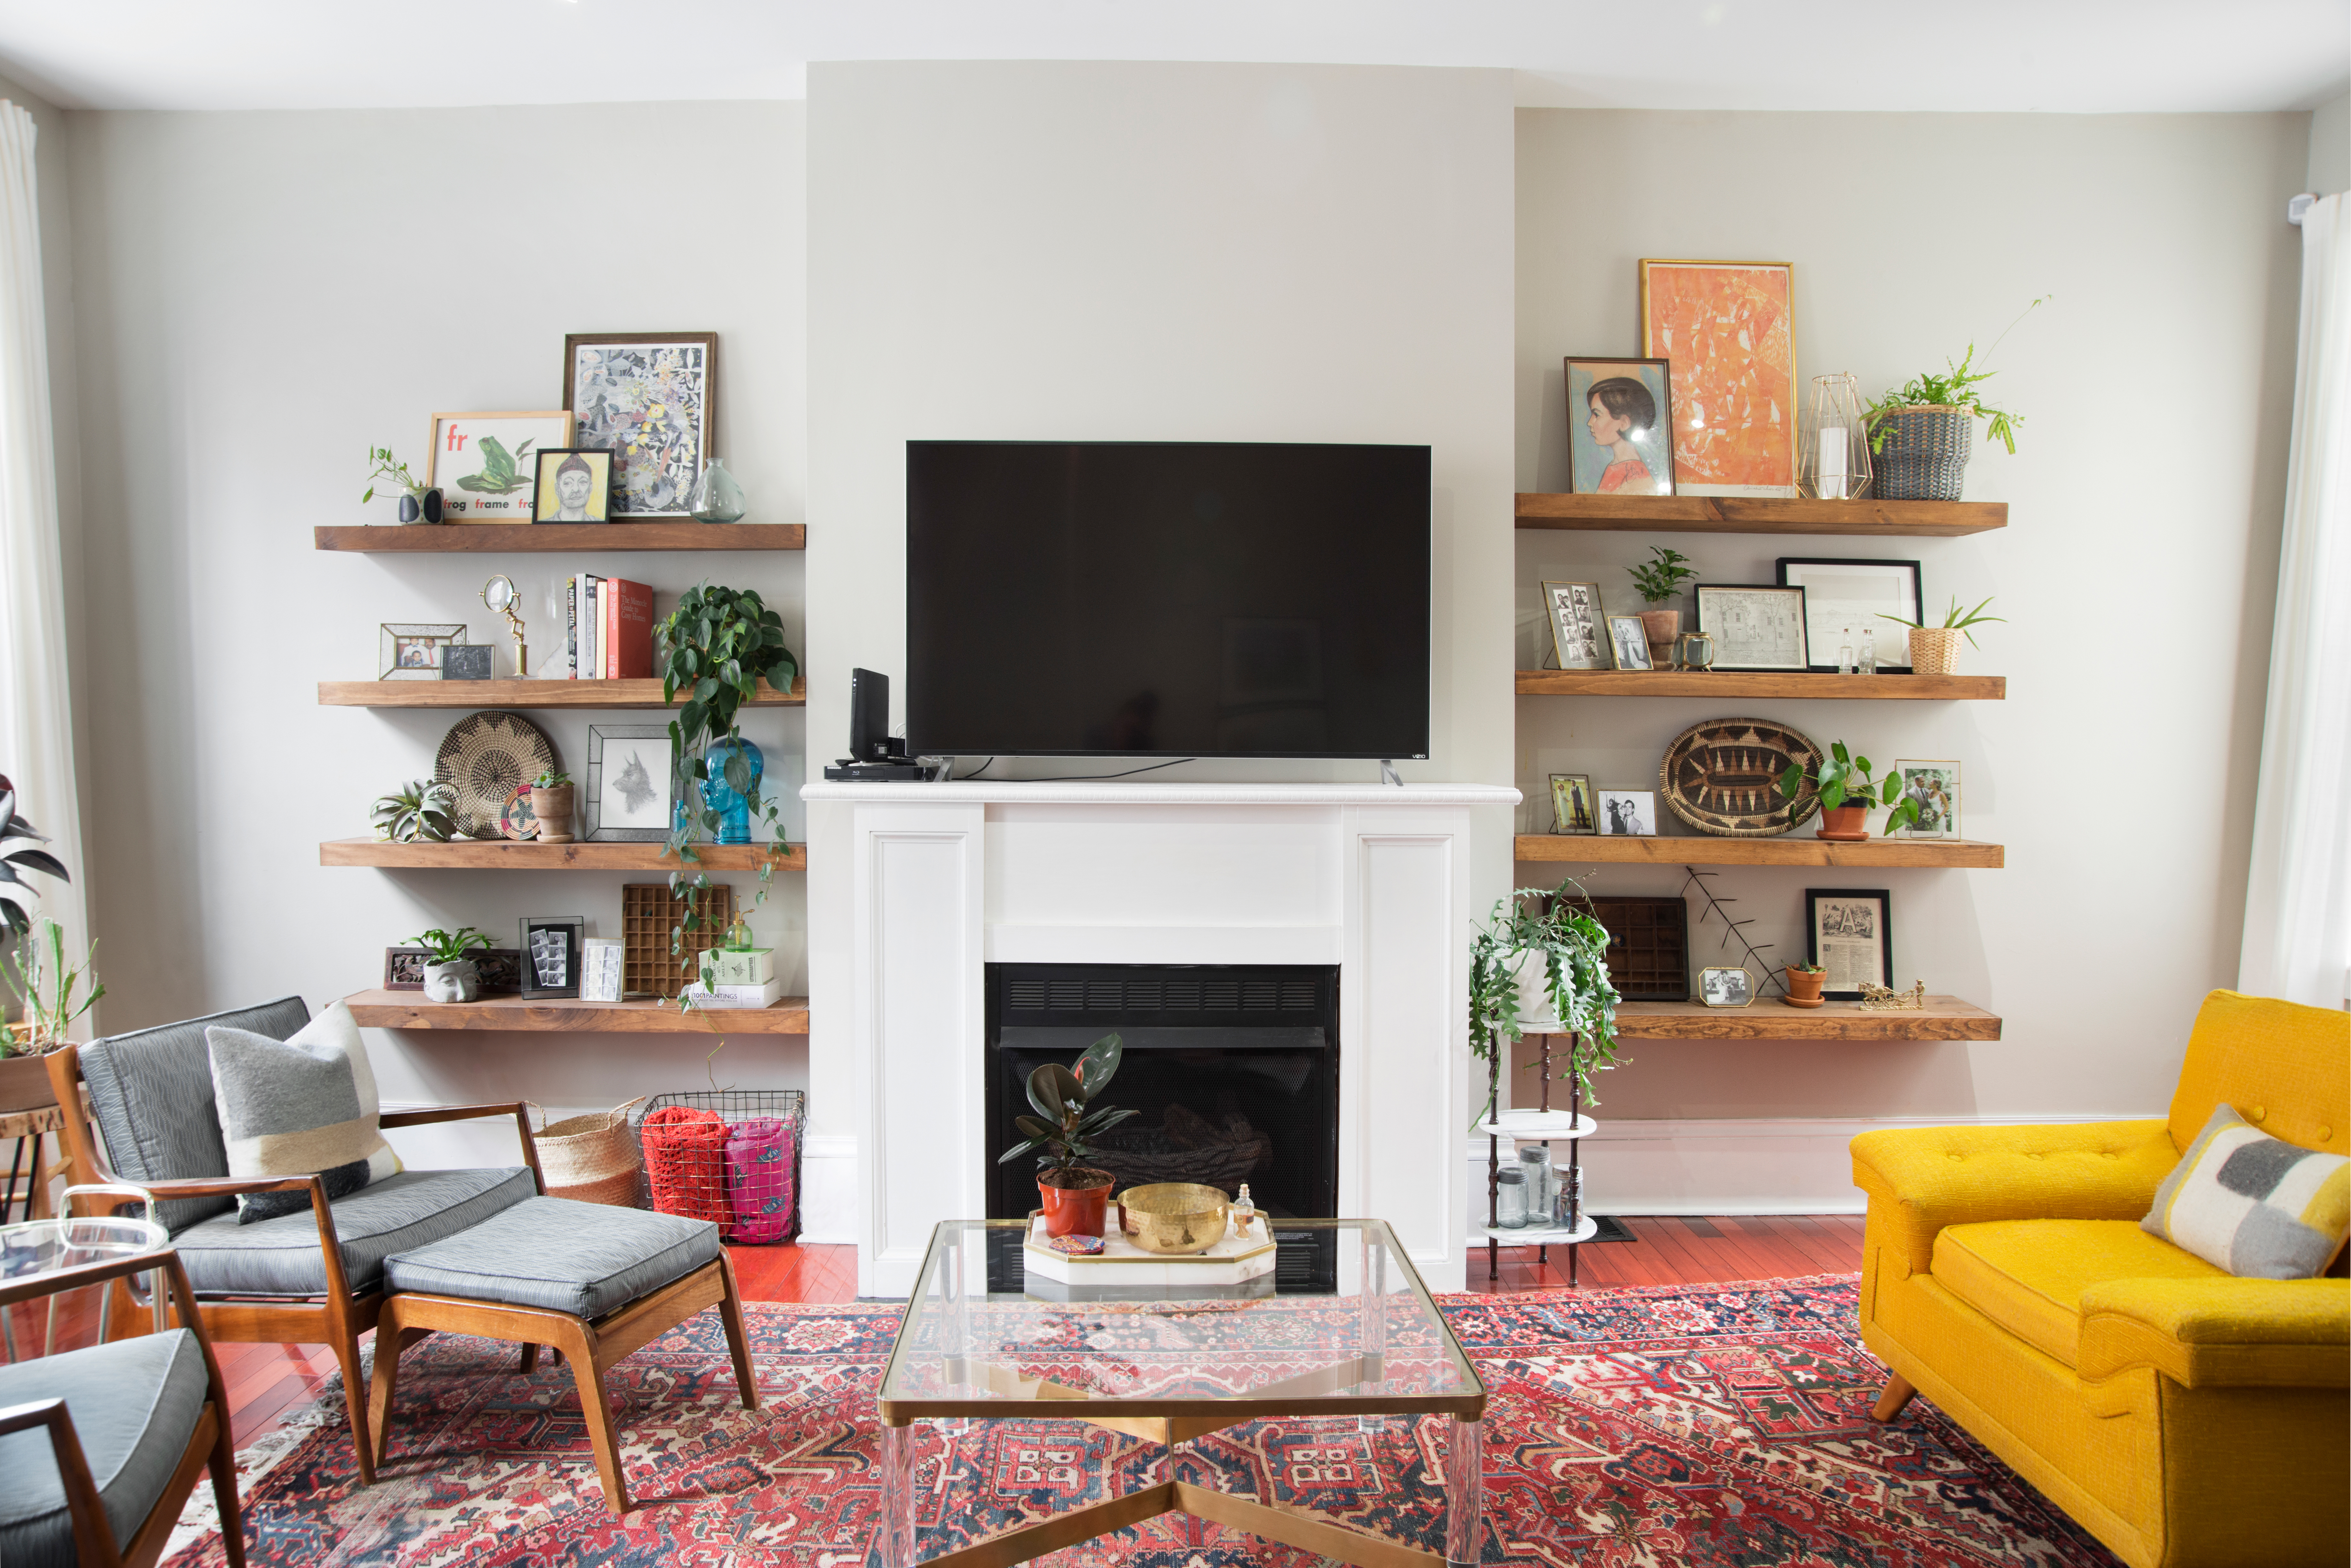
Source: apartmenttherapy.com
Project 6: Applying Peel-and-Stick Wallpaper for a Low-Risk Feature Wall This renter-friendly magic turns a boring wall into a statement. Cost: $30–$80 for a roll or two. Time: 2–4 hours.
Steps:
- Clean and dry the wall thoroughly.
- Measure and cut panels with overlap.
- Peel backing and align from the top, smoothing bubbles as you go.
- Trim around outlets and edges with a utility knife.
It peels off cleanly when you leave—no damage, all drama.
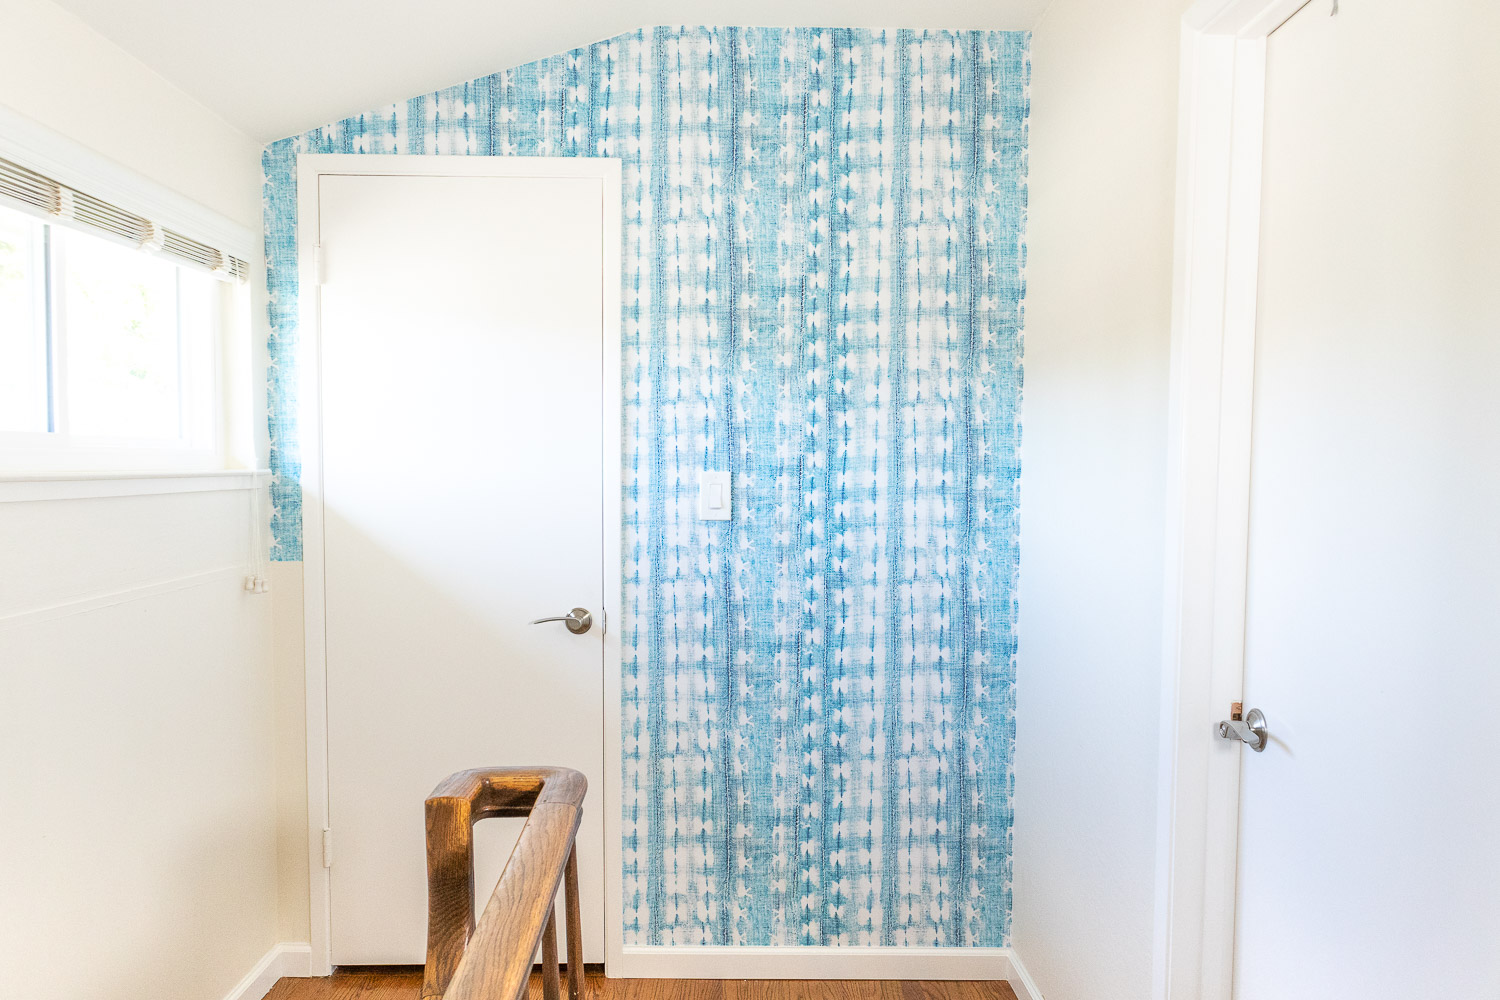
Source: freshlyfuji.com
Budget Kitchen and Bathroom Revamps
Project 7: Using Specialized Kits to Refinish Outdated Countertops A countertop kit (like Rust-Oleum) gives laminate a stone-like finish. Cost: $50–$90. Time: 4–6 hours over a weekend.
Quick steps:
- Clean and lightly sand the surface.
- Apply the base coat.
- Add the decorative layer and topcoat.
- Let cure fully (usually 3 days).
Big kitchen update, tiny price tag.

Source: youtube.com
Project 8: Installing a Subway Tile Backsplash (Peel-and-Stick or Traditional) A classic white subway tile look upgrades any kitchen or bath. Cost: $20–$60. Time: 2–3 hours.
How:
- Clean the wall.
- Start at the bottom with a level line.
- Peel and stick tiles (or apply adhesive for traditional).
- Press firmly and cut for outlets.
Renter hack: Stick peel-and-stick over temporary contact paper for zero residue.
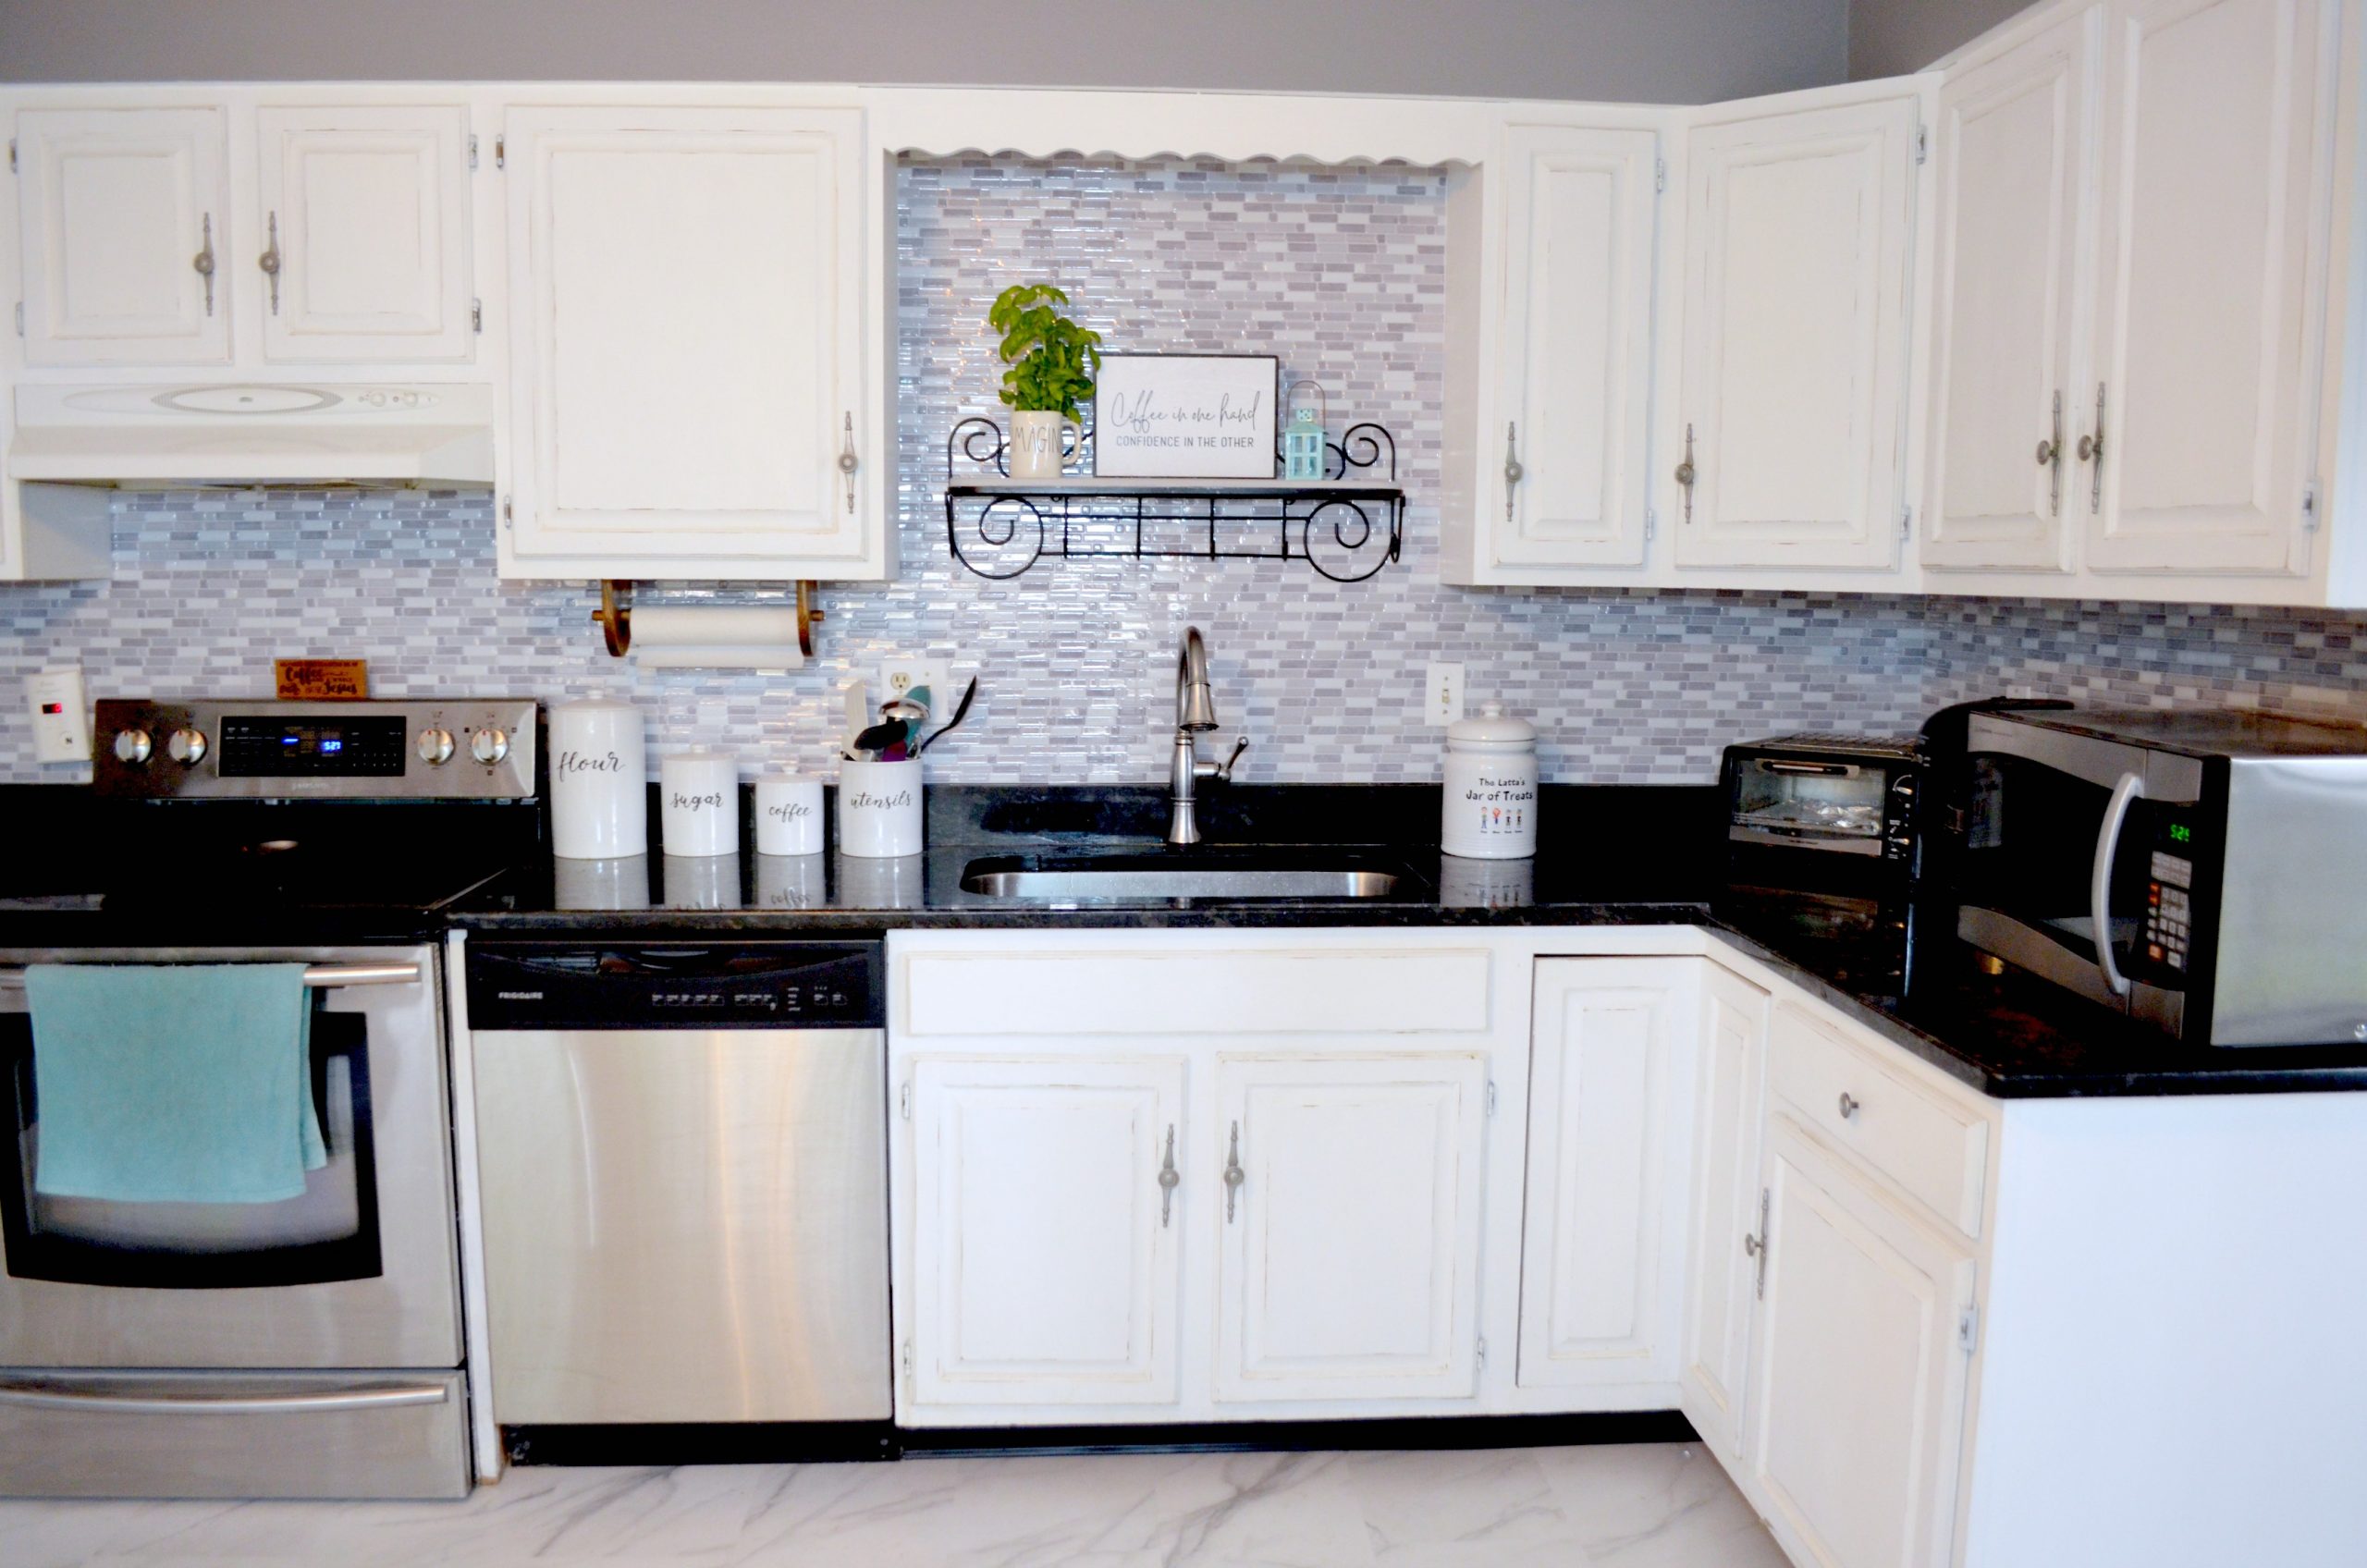
Source: amylattacreations.com
Functional and Creative DIY Home Projects Under $100
These organizers and upgrades add serious sweat equity while staying wallet-friendly.
Organizing with Style
Project 9: Creating a DIY “Command Center” for Mail, Keys, and Calendars A wall-mounted station keeps chaos at bay near the entry or kitchen. Cost: $15–$40. Time: 1–2 hours.
Build it:
- Hang a corkboard or whiteboard.
- Add hooks, baskets, and a calendar.
- Label everything for easy family use.
Mine cut morning panic in half.
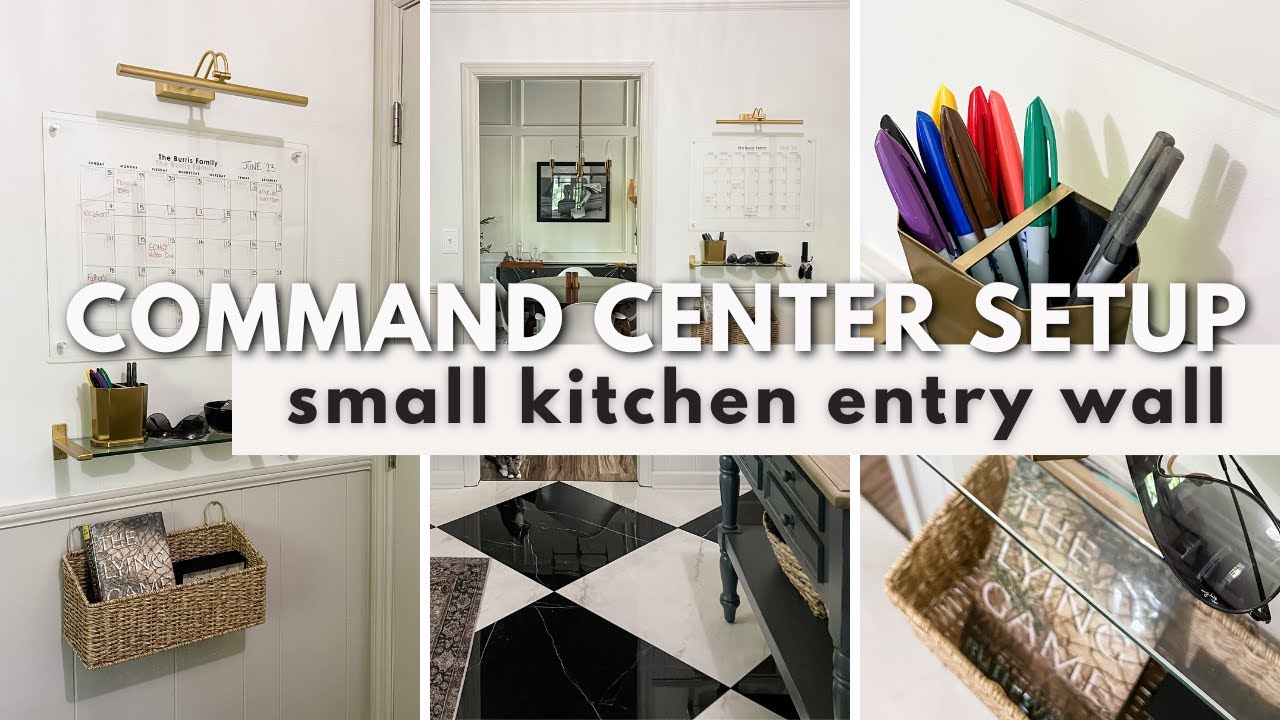
Source: youtube.com
Project 10: Building Custom Closet Organizers to Maximize Small Storage Spaces Add shelves, drawers, and rods for a custom closet feel. Cost: $40–$80. Time: 3–4 hours.
Steps:
- Measure your closet.
- Install vertical supports and shelves with brackets.
- Add a tension rod or new hanging bar.
- Finish with paint or shelf liner.
Transforms wasted space into gold.
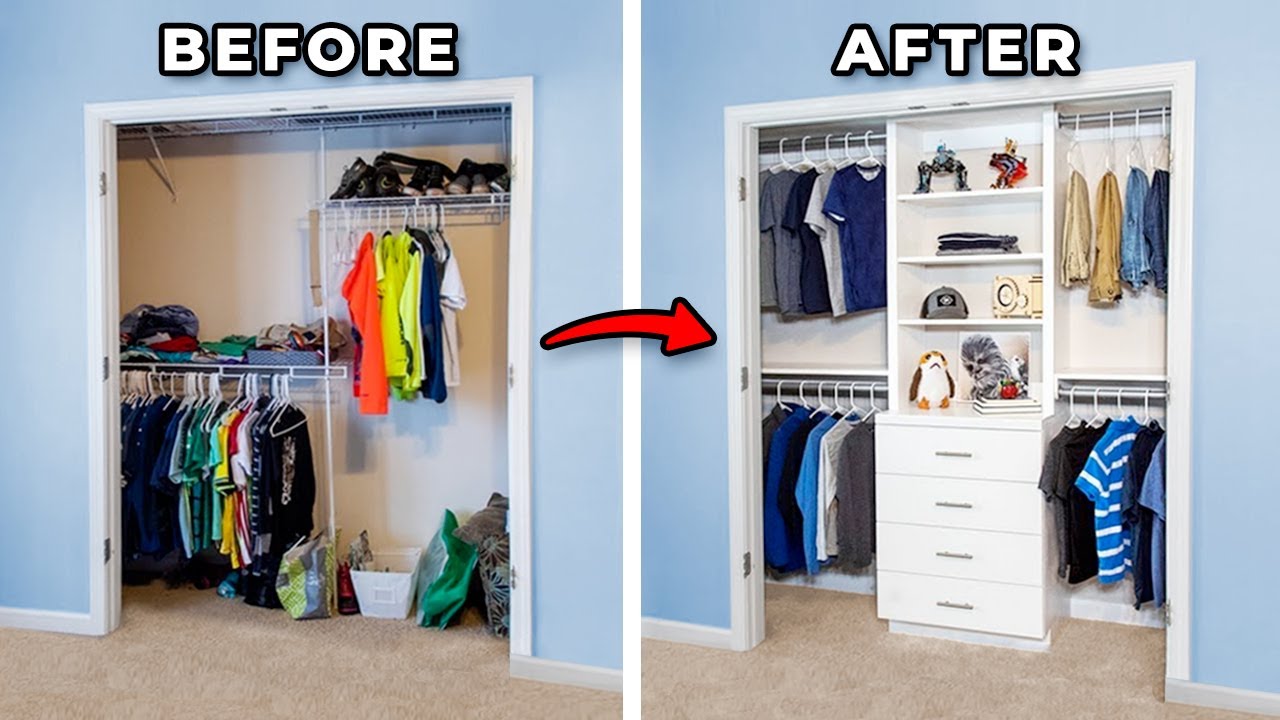
Source: youtube.com
Lighting and Ambiance Upgrades
Project 11: Swapping Out Builder-Grade “Boob Lights” for Modern Pendant Fixtures Ditch those basic ceiling fixtures for stylish pendants. Cost: $30–$70 per light. Time: 1 hour per fixture (turn off power first!).
How:
- Turn off breaker and remove old light.
- Connect wires (black to black, white to white).
- Mount the new fixture.
- Test and enjoy the glow.
Huge mood shift for minimal effort.
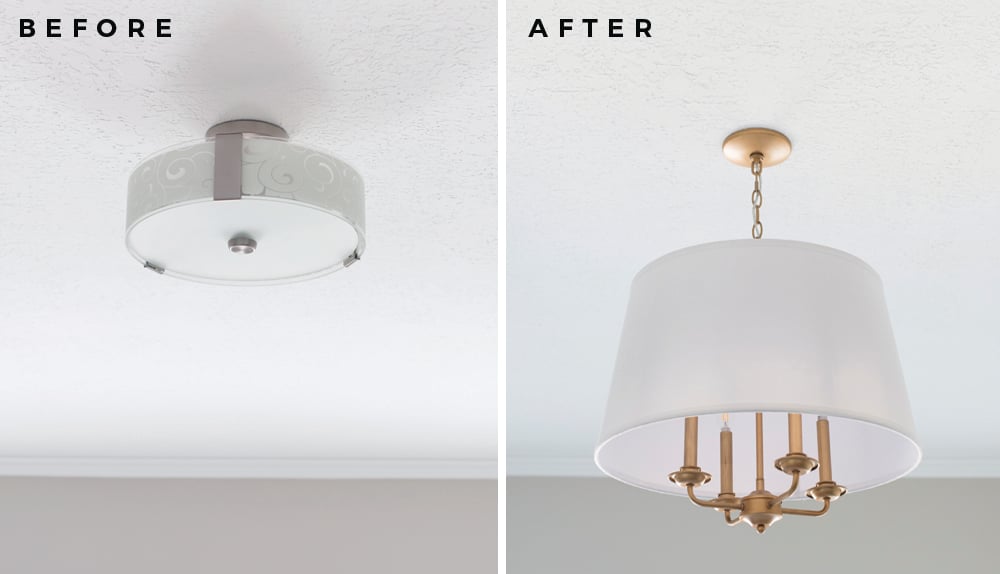
Source: roomfortuesday.com
Project 12: Adding Battery-Operated LED Strip Lighting Under Kitchen Cabinets Instant task lighting that makes cooking feel luxe. Cost: $15–$35. Time: 30 minutes.
Just peel, stick under cabinets, and link the battery packs. No wiring needed—perfect for renters.

Source: youtube.com
Outdoor DIY Home Projects for Better Living
Take the transformation outside with these summer-ready ideas.
Creating an Outdoor Oasis
Project 13: Building a Simple Fire Pit Area with Pavers and Gravel Create a cozy gathering spot. Cost: $50–$90. Time: 3–4 hours.
Steps:
- Mark a circle and clear grass.
- Lay pavers in a ring.
- Fill the center with gravel and add a fire bowl.
- Add seating around it.
Nights just got better.

Source: themandagies.com
How We Built a Low-Budget Backyard Fire Pit (Step-By-Step Guide + Price Breakdown!) How We Built a Low-Budget Backyard Fire Pit (Step-By-Step Guide + Price Breakdown!) The Mandagies
Project 14: Constructing Vertical Planters or Herb Gardens for Small Patios Grow fresh herbs or flowers vertically to save space. Cost: $20–$50. Time: 1–2 hours.
Build or buy a ladder-style frame, attach planters, fill with soil, and plant. Great for balconies or tiny yards.
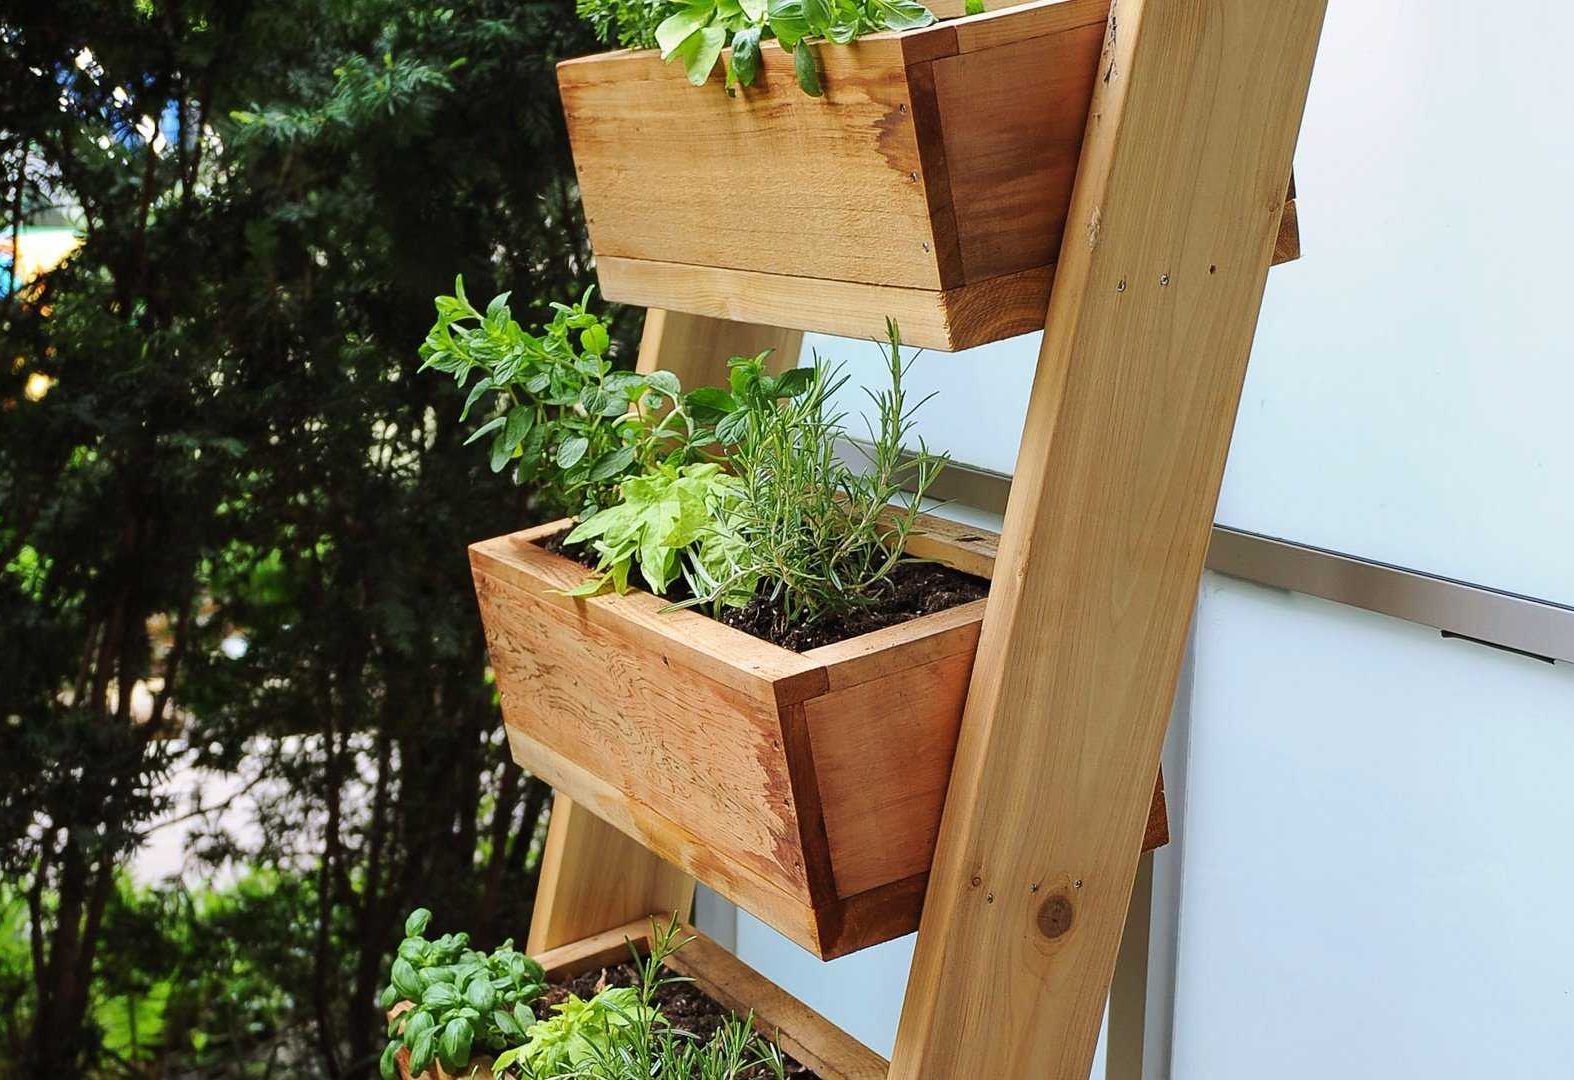
Source: browneshomecenter.com
Deck and Patio Maintenance
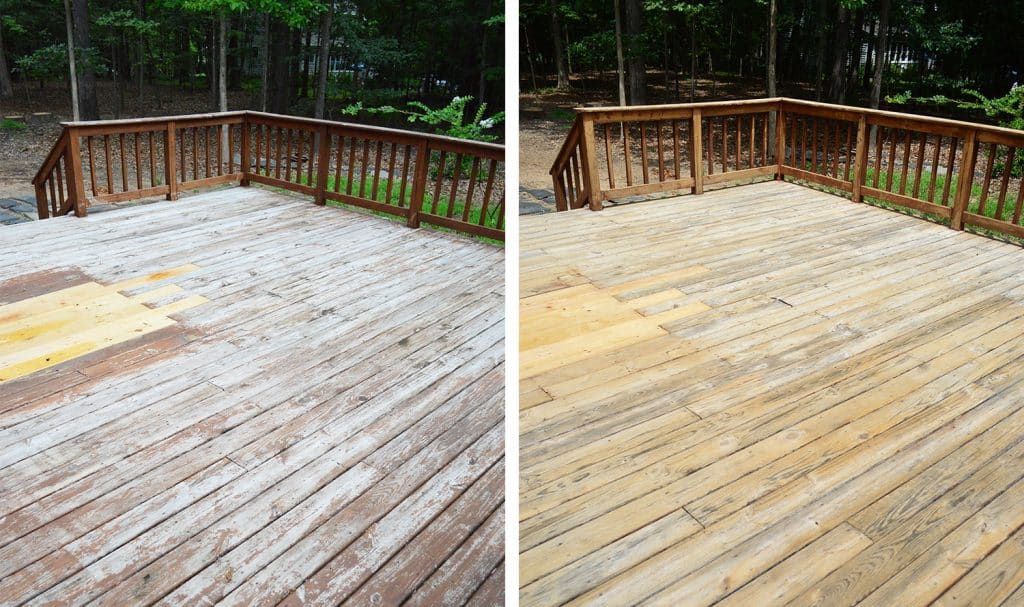
Project 15: Power Washing and Re-Staining Wood Surfaces + Stringing Edison Bulbs Revive your deck or patio and add evening magic. Cost: $40–$80 (rental washer + stain). Time: 4–6 hours.
How:
- Power wash to remove dirt and old finish.
- Let dry, then apply stain with a roller or brush.
- String Edison bulbs overhead for instant ambiance.
Prevents rot, boosts curb appeal, and turns your outdoor space into a retreat.
Source: younghouselove.com

Source: homedit.com
Planning Your Next Move: Tools and Safety
The Essential DIY Toolkit
You don’t need a full workshop. Start with: cordless drill, level, measuring tape, screwdriver set, hammer, painter’s tape, safety glasses, and gloves. Total starter kit: under $100 if you buy smart.
When to DIY vs. When to Call a Pro
Stick to these projects—they’re low-risk. Skip electrical or plumbing work unless you’re experienced (or hire a pro to avoid headaches and code issues).
Conclusion
There you have it—15 high-impact DIY home projects that prove you can transform your space on a budget with a little sweat equity. Remember, it’s about progress, not perfection. Even one weekend project can make your home feel fresh, functional, and totally yours.
These small changes add real value (paint, curb appeal, and smart storage top the list for ROI), and they’re doable whether you own or rent. So pick one from the list, tackle it this coming weekend, and share your before-and-after in the comments—I’d love to cheer you on. You’ve got this! What’s your first project going to be?