
Imagine spending weeks crafting a perfect 3D character, only to load it in Source Filmmaker and see nothing but a glaring pink checkerboard staring back at you. Frustrating, right? That moment when your creative vision hits a technical wall is exactly why understanding the sfm compile process transforms you from a frustrated artist into a confident filmmaker.
Every stunning SFM animation you have ever admired started as raw files. Models, textures, and maps exist in formats the Source Engine simply cannot read. Without proper compiling, your custom assets remain invisible digital ghosts. This guide walks through everything you need to know about converting those raw creations into polished, usable assets that bring your stories to life.
What Exactly Happens During SFM Compile
The Source Engine speaks its own language. When you create models in Blender, Maya, or any 3D software, you save them in formats like .smd, .dmx, or .obj. Textures might sit as .png or .tga files. Maps exist as .vmf documents waiting for transformation.
Compiling acts as the translator. It packages your assets into proprietary Valve formats that SFM can instantly recognize and render. Think of it like preparing a meal. You have all the ingredients in their raw form. Compiling is the cooking process that turns those ingredients into a dish your guests can actually eat.
Without this step, SFM simply shrugs its digital shoulders. Models refuse to appear. Textures show up as those infamous pink and black checkerboards. Maps crash or display as empty voids. Mastering the sfm compile workflow means you never have to face these creative killers again.
Compiling Models: Bringing Characters to Life
Models form the heart of any SFM project. Whether you are importing a custom character, a prop, or a complex piece of machinery, the process follows a structured path.
The QC File: Your Model’s Instruction Manual
Every successful model compile begins with a QC file. This humble text document tells the compiler exactly what to do with your raw assets. It contains vital information including the model name, the folder structure where files should go, which textures to apply, and how the model should behave in the engine.
Here is what a typical QC file contains:
- $modelname: The final path where your compiled model will live
- $body: Links to your .smd or .dmx mesh files
- $texturegroup: Lists all the textures associated with the model
- $sequence: Defines animations if your model includes them
- $collisionmodel: Sets up physics interactions
- $surfaceprop: Determines how the model reacts to sounds and physics
Creating a QC file requires attention to detail. A single typo in a file path or a mismatched texture name can break the entire compile. Many new users overlook case sensitivity. The Source Engine cares about capital letters. “Texture.png” and “texture.png” are completely different files in its eyes.
Studiomdl.exe: Valve’s Native Compiler
Valve provides the official compiler tool called studiomdl.exe. You will find it tucked away in the SFM bin folder alongside other essential tools. Using studiomdl involves command line operations. You navigate to the folder containing your QC file and run a command like:
text
studiomdl.exe yourmodel.qc
For users comfortable with command lines, this method works perfectly. It gives you direct control and immediate feedback. The command window shows you exactly what the compiler is doing and, more importantly, where it runs into problems.
Crowbar: The Community Favorite
Command lines intimidate many artists. They want to create, not type cryptic instructions. Enter Crowbar, a community-developed graphical interface that simplifies the entire sfm compile experience.
Crowbar wraps studiomdl.exe in a friendly interface with buttons, file browsers, and clear options. You simply select your QC file, choose your output settings, and click Compile. The tool handles everything behind the scenes while showing you progress and error messages in a readable format.
Why do most users prefer Crowbar? Several reasons:
- Visual file browsing eliminates typing errors
- Built-in QC file editor with syntax highlighting
- Automatic folder structure management
- Batch compiling for multiple models
- Integration with other Source tools
For beginners, Crowbar removes the steep learning curve. For veterans, it saves precious minutes on every compile, minutes that add up across dozens of assets.
Compiling Maps: Building Your World
Maps represent entire environments. A single map can contain hundreds of objects, complex lighting setups, and intricate visibility calculations. The sfm compile process for maps involves three distinct stages, each handled by a separate tool.
Understanding the Three-Stage Process
| Compile Stage | Tool | Function | Common Issues |
|---|---|---|---|
| Geometry Building | VBSP | Constructs physical world geometry from .vmf files | Invalid solids, overlapping brushes |
| Visibility Calculation | VVIS | Determines what renders from different viewpoints | Leaks prevent VVIS from running entirely |
| Lighting Processing | VRAD | Bakes lightmaps and shadows into the scene | Long compile times with complex lighting |
Each stage builds upon the previous one. VBSP creates the raw structure. VVIS optimizes performance by determining what the engine needs to render. VRAD adds the visual polish that makes scenes feel real and immersive.
VBSP takes your Hammer Editor file and converts it into a .bsp file that SFM understands. This stage checks for geometry errors, invalid brushes, and structural problems. If VBSP fails, your map cannot progress to later stages.
VVIS might be the most misunderstood part of map compiling. It analyzes your map and divides it into visibility regions. When you stand in one room, VVIS tells the engine it does not need to render rooms behind closed doors or around corners. This optimization is crucial for performance. A map without VVIS data will run terribly, dragging frame rates to a crawl.
VRAD brings the beauty. It calculates every light source, every shadow, and every bounce of light throughout your map. This stage can take hours for complex scenes, but the results justify the wait. Good lighting transforms a flat gray box into a believable space.
Common Map Compile Pitfalls
Leaks stop map compiles cold. A leak occurs when your map has a hole connecting the interior space to the void outside. The VVIS stage cannot calculate visibility in an open system, so it simply stops working. The solution involves sealing your map completely or using a skybox texture to create a contained environment.
Excessive light sources cause VRAD to run for hours or even days. Each light adds calculation time. A room with twenty point lights might compile in minutes. A room with two hundred point lights might compile overnight. Smart lighting design uses fewer lights with higher quality settings rather than flooding scenes with unnecessary illumination.
Compiling Textures: The Visual Foundation
Textures give your models and maps their visual identity. Without proper textures, even the most detailed model looks like a gray placeholder. The sfm compile process for textures involves converting standard image files into Valve’s proprietary formats.
VTF and VMT: The Source Texture Duo
Source Engine textures rely on two file types working together. The VTF file contains the actual image data. The VMT file is a text script that tells the engine how to apply that image.
VTF files support features standard image formats cannot handle. They include mipmaps for distant rendering, compression options for performance, and support for bump maps and normal maps that create surface detail without adding geometry.
VMT files contain instructions like:
- $basetexture: Points to the VTF file
- $surfaceprop: Determines footstep sounds and bullet impacts
- $translucent: Enables transparency
- $selfillum: Makes textures glow
- $envmap: Creates reflective surfaces
VTFEdit: Your Texture Compiler
VTFEdit is the essential tool for texture compiling. This free utility converts .tga, .png, .jpg, and other formats into VTF files while automatically generating the accompanying VMT files.
The workflow is straightforward. You open your source image in VTFEdit, adjust compression settings based on your needs, and save. The program creates both the VTF and VMT files in your specified folder. You can also edit existing VMT files to add effects like specular highlights or transparency.
Texture compression matters more than most artists realize. High-quality uncompressed textures look beautiful but consume massive amounts of memory. A single 2048×2048 texture can use over 16MB of video RAM. With dozens of textures in a scene, memory quickly becomes a bottleneck. VTFEdit lets you choose compression formats that balance visual quality against performance.
Troubleshooting: Solving Compile Errors
Even experienced artists encounter compile errors. Knowing how to diagnose and fix them saves hours of frustration.
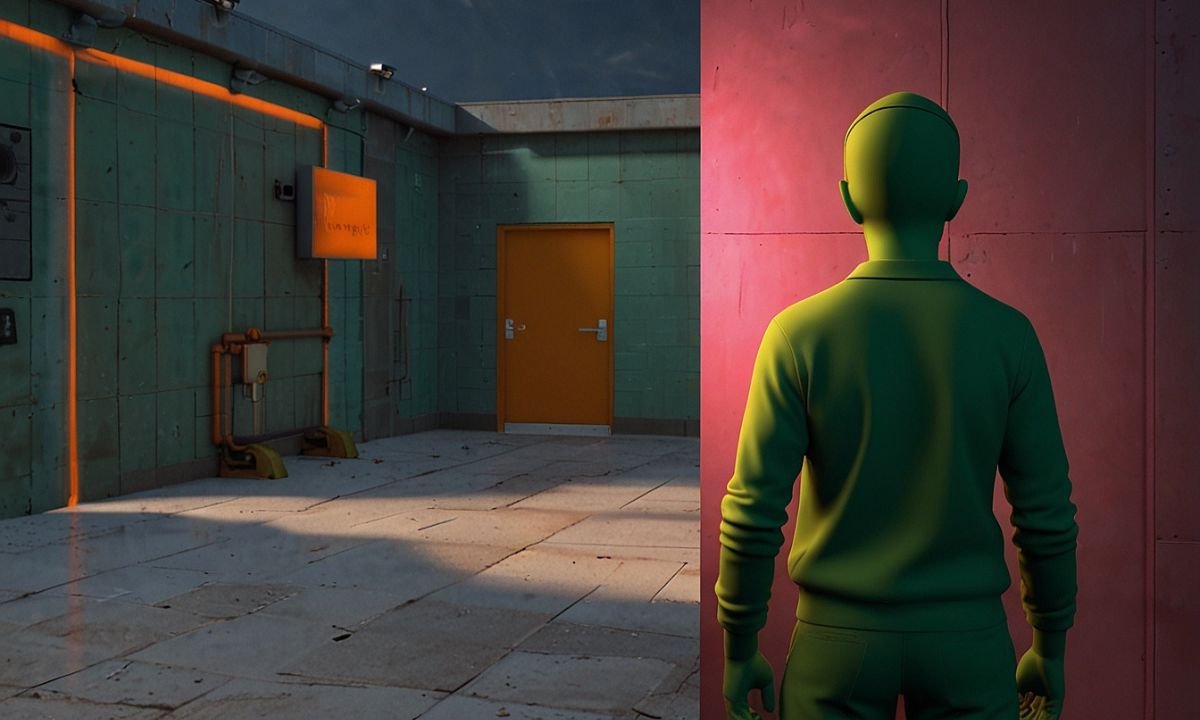
Pink Checkerboard Textures
That pink and black checkerboard pattern is the Source Engine’s way of saying it cannot find your texture. The engine knows a texture should exist because the VMT or QC file references it, but the actual VTF file is missing or in the wrong location.
Solutions to try:
- Verify the VTF file exists in the folder path specified in your VMT
- Check for case sensitivity mismatches in file names
- Ensure your texture files are actually compiled as VTF, not just renamed from .png
- Confirm the VMT file is in the correct materials folder structure
Invisible Models
You compile a model successfully, place it in your scene, and nothing appears. The model compiles but renders invisibly. This usually points to scale issues or origin point problems.
Models that compile but appear invisible often exist at microscopic scales. If your model was created in a system using meters but the Source Engine expects units measured in inches, a character might be so small you cannot see it without zooming extremely close. Checking your QC file’s scale settings or re-exporting from your 3D software with correct units resolves this.
Compile Crashes
When studiomdl.exe or Crowbar crashes during compile, the error usually relates to corrupt source files or memory limitations. Very high polygon counts can overwhelm the compiler. Splitting complex models into multiple body parts or reducing polygon density often fixes the issue.
Corrupt .smd files cause crashes too. Re-exporting from your modeling software with clean settings typically resolves corruption problems.
Best Practices for Smooth Compiling
Experience teaches that certain habits make the sfm compile process consistently successful.
Organize your files before you start compiling. Create a clear folder structure that mirrors how Source expects files to be arranged. Models go in models folders, materials in materials folders, maps in maps folders. This organization prevents the path errors that plague disorganized projects.
Test frequently rather than building everything and testing once. Compile early versions of your model or map to catch problems when they are easy to fix. A small problem discovered early saves hours of debugging later.
Keep a compile log. When errors occur, save the error messages. These messages contain clues that help diagnose problems. The community can help if you provide specific error text rather than vague descriptions.
Use version control for your source files. Save versions of your QC files, source models, and textures as you work. When something breaks, you can revert to a working version instead of starting over.
Frequently Asked Questions
Why does my model show up as a pink checkerboard after compile?
The pink checkerboard indicates missing textures. Your model compiled successfully, but the texture files referenced in your QC or VMT are not where the engine expects them. Check your file paths, ensure VTF files exist, and verify case sensitivity matches exactly.
What is the difference between studiomdl.exe and Crowbar?
Studiomdl.exe is Valve’s official command-line compiler. Crowbar is a community-made graphical interface that uses studiomdl.exe behind the scenes. Crowbar makes compiling easier by providing visual file browsing and eliminating command-line complexity.
How long should map compiling take?
Map compile times vary dramatically based on map complexity. Simple maps might compile in minutes. Large, detailed maps with complex lighting can take hours. VRAD lighting calculations are the primary time factor. You can reduce compile time by using fewer light sources and optimizing your map geometry.
Can I compile models without a QC file?
No. The QC file is essential for model compiling. It provides all the instructions the compiler needs to build your model correctly. Without it, the compiler has no way of knowing which files to use or how to assemble them.
Why does VVIS stop working on my map?
VVIS stops when your map has a leak. A leak means there is an opening connecting the interior of your map to the exterior void. Seal all holes, ensure no gaps between brushes, and use the load pointfile feature in Hammer to locate and fix leaks.
What resolution should I use for VTF textures?
Texture resolution depends on your needs and performance constraints. 1024×1024 works well for most character textures. 2048×2048 provides more detail but uses significantly more memory. Environment textures can often use 512×512 or smaller without visible quality loss.
How do I add animations to my compiled model?
Animations must be included in your QC file as $sequence commands referencing .smd animation files. The compiler packages these animations into your model file. You can then access them in SFM through the animation sets panel.
Your Next Steps to SFM Mastery
Understanding the sfm compile process separates those who struggle with technical barriers from those who create freely. Every asset you compile successfully adds another tool to your creative arsenal. Each error you troubleshoot teaches you something about how the Source Engine thinks.
Start with one asset type. Master model compiling first, then tackle maps, then textures. Build a library of working QC files you can adapt for future projects. Save your compile logs as references. Join community forums where experienced compilers share solutions to common problems.
The pink checkerboards and invisible models will still appear occasionally. Now you know exactly how to banish them. Your characters will load properly. Your environments will render beautifully. Your animations will stand on a foundation of properly compiled, optimized assets ready to bring your stories to the screen.